Overview
Debian に OpenXPKI をインストールする。
Absolute
Debian に OpenXPKI の Smaple データを用いて Private PKI 環境を構築する。
独自の Domain (Realm) を構築する場合は別途 Realm を設定する必要がある。
Reference
Environment
Debian
$ cat /etc/os-release
PRETTY_NAME="Debian GNU/Linux 10 (buster)"
NAME="Debian GNU/Linux"
VERSION_ID="10"
VERSION="10 (buster)"
VERSION_CODENAME=buster
ID=debian
HOME_URL="https://www.debian.org/"
SUPPORT_URL="https://www.debian.org/support"
BUG_REPORT_URL="https://bugs.debian.org/"
$ uname -a
Linux svr-xpki 4.19.0-17-amd64 #1 SMP Debian 4.19.194-3 (2021-07-18) x86_64 GNU/Linux
$
OpenXPKI
# openxpkiadm version
Version (core): 3.12.0
#
Installation
$ su -
Password:
#
# apt install gpg
# wget https://packages.openxpki.org/v3/debian/Release.key -O - | apt-key add -
--2021-08-08 11:11:51--  https://packages.openxpki.org/v3/debian/Release.key
Resolving packages.openxpki.org (packages.openxpki.org)... 82.135.58.89
Connecting to packages.openxpki.org (packages.openxpki.org)|82.135.58.89|:443... connected.
HTTP request sent, awaiting response... 200 OK
Length: 2493 (2.4K) [application/pgp-keys]
Saving to: ‘STDOUT’

-                      100%[==========================>]   2.43K  --.-KB/s    in 0s

2021-08-08 11:11:52 (251 MB/s) - written to stdout [2493/2493]

OK
#
# echo "deb http://packages.openxpki.org/v3/debian/ buster release" > /etc/apt/sources.list.d/openxpki.list
# apt update
Hit:1 http://security.debian.org/debian-security buster/updates InRelease
Hit:2 http://ftp.riken.jp/Linux/debian/debian buster InRelease
Hit:3 http://ftp.riken.jp/Linux/debian/debian buster-updates InRelease
Get:4 http://packages.openxpki.org/v3/debian buster InRelease [1,708 B]
Get:5 http://packages.openxpki.org/v3/debian buster/release amd64 Packages [10.1 kB]
Fetched 11.8 kB in 1s (8,598 B/s)
Reading package lists... Done
Building dependency tree
Reading state information... Done
All packages are up to date.
#
# apt install default-mysql-server libdbd-mysql-perl
# apt install apache2 libapache2-mod-fcgid
# a2enmod fcgid
Module fcgid already enabled
#
# a2enmod rewrite
Enabling module rewrite.
To activate the new configuration, you need to run:
  systemctl restart apache2
#
# apt install libopenxpki-perl openxpki-cgi-session-driver openxpki-i18n
# openxpkiadm version
Version (core): 3.12.0
#
# systemctl status apache2
● apache2.service - The Apache HTTP Server
   Loaded: loaded (/lib/systemd/system/apache2.service; enabled; vendor preset: enabled)
   Active: active (running) since Sun 2021-08-08 12:19:18 JST; 2s ago
     Docs: https://httpd.apache.org/docs/2.4/
  Process: 595 ExecStart=/usr/sbin/apachectl start (code=exited, status=0/SUCCESS)
 Main PID: 599 (apache2)
    Tasks: 56 (limit: 2359)
   Memory: 10.5M
   CGroup: /system.slice/apache2.service
           ├─599 /usr/sbin/apache2 -k start
           ├─600 /usr/sbin/apache2 -k start
           ├─601 /usr/sbin/apache2 -k start
           └─602 /usr/sbin/apache2 -k start

Aug 08 12:19:18 svr-xpki systemd[1]: Starting The Apache HTTP Server...
Aug 08 12:19:18 svr-xpki systemd[1]: Started The Apache HTTP Server.
#
# mysql -u root -p
Enter password:
Welcome to the MariaDB monitor.  Commands end with ; or \g.
Your MariaDB connection id is 36
Server version: 10.3.29-MariaDB-0+deb10u1 Debian 10

Copyright (c) 2000, 2018, Oracle, MariaDB Corporation Ab and others.

Type 'help;' or '\h' for help. Type '\c' to clear the current input statement.

MariaDB [(none)]> CREATE DATABASE openxpki CHARSET utf8;
Query OK, 1 row affected (0.000 sec)

MariaDB [(none)]> CREATE USER 'openxpki'@'localhost' IDENTIFIED BY 'openxpki';
Query OK, 0 rows affected (0.023 sec)

MariaDB [(none)]> GRANT ALL ON openxpki.* TO 'openxpki'@'localhost';
Query OK, 0 rows affected (0.001 sec)

MariaDB [(none)]> flush privileges;
Query OK, 0 rows affected (0.001 sec)

MariaDB [(none)]> quit
Bye
#
# cat /etc/openxpki/config.d/system/database.yaml
main:
debug: 0
type: MariaDB
name: openxpki
host: localhost
port: 3306
user: openxpki
passwd: openxpki

# extra options passed to the driver as parameter
#driver:
# LongReadLen: 10000000

# How often to try to connect to the database on startup if not avail -
# default is to fail immediately. This is mainly useful if database and
# OpenXPKI are started by the same init process and the DB might take
# some time to come up
#wait_on_init:
# retry_count: 10
# retry_interval: 30

# To log to a different database create a section "log" by copying and adjusting
# the upper block, e.g.:
#
# log:
# debug: 0
# ...

# Set environment values, e.g. locales for Oracle
# this was inside the db section prior v2.2 which does not work as expected
# environment:
# key: value
#
# zcat /usr/share/doc/libopenxpki-perl/examples/schema-mariadb.sql.gz |  mysql -u root --password --database  openxpki
Enter password:
#
# zcat /usr/share/doc/libopenxpki-perl/examples/sampleconfig.sh.gz | bash
Fully automated sample setup using tmpdir /tmp/tmp.vZfefwnrHM
creating configuration for openssl () .. done.
Creating certificates ..
Did not find a root ca certificate file.
Creating an own self signed root ca .. done.
Did not find existing issuing CA key file.
Creating an issuing CA request .. done.
Signing issuing certificate with own root CA .. done.
Did not find existing DataVault certificate file.
Creating a self signed DataVault certificate .. done.
Did not find existing SCEP certificate file.
Creating a SCEP request .. done.
Signing SCEP certificate with Issuing CA .. done.
Did not find existing WEB certificate file.
Creating a Web request .. done.
Signing Web certificate with Issuing CA .. done.
Starting server before running import ... Starting OpenXPKI Community Edition v3.12.0
OpenXPKI Server is running and accepting requests.
DONE.
Successfully imported certificate into database:
  Subject:    CN=OpenXPKI Root CA 20210808
  Issuer:     CN=OpenXPKI Root CA 20210808
  Identifier: P_rRjE1RFjWM1ynUNugx4fuubHc
  Realm:      none
Successfully wrote key to /etc/openxpki/local/keys/vault-1.pem
Successfully wrote alias:
  Alias     : vault-1
  Identifier: TGo7gL63_SWki2XF5O51-NcZrtA
  NotBefore : 2021-08-08 04:52:32
  NotAfter  : 2031-08-11 04:52:32

Successfully wrote key to datapool with key 'ca-signer-1'
Successfully wrote alias:
  Alias     : ca-signer-1
  Identifier: E3MmGW2q8kY26H_UB99HePxocII
  NotBefore : 2021-08-08 04:52:32
  NotAfter  : 2026-08-10 04:52:32


Token is certsign, looking for root...
Creating alias for root ca:
  Alias     : root-1
  Identifier: P_rRjE1RFjWM1ynUNugx4fuubHc
  NotBefore : 2021-08-08 04:52:32
  NotAfter  : 2031-08-11 04:52:32

Successfully wrote key to datapool with key 'scep-1'
Successfully wrote alias:
  Alias     : scep-1
  Identifier: bkbjKysQc3iPJdTiL4U1yJ7TWzw
  NotBefore : 2021-08-08 04:52:33
  NotAfter  : 2022-08-08 04:52:33

done.

Considering dependency setenvif for ssl:
Module setenvif already enabled
Considering dependency mime for ssl:
Module mime already enabled
Considering dependency socache_shmcb for ssl:
Enabling module socache_shmcb.
Enabling module ssl.
See /usr/share/doc/apache2/README.Debian.gz on how to configure SSL and create self-signed certificates.
Module rewrite already enabled
Module headers already enabled
To activate the new configuration, you need to run:
  systemctl restart apache2
Site openxpki already enabled
Site 000-default disabled.
Site default-ssl already disabled
To activate the new configuration, you need to run:
  systemctl reload apache2
Doing /etc/openxpki/tls/chain/
Doing /etc/ssl/certs
OpenXPKI configuration should be and server should be running...

Thanks for using OpenXPKI - Have a nice day ;)

#
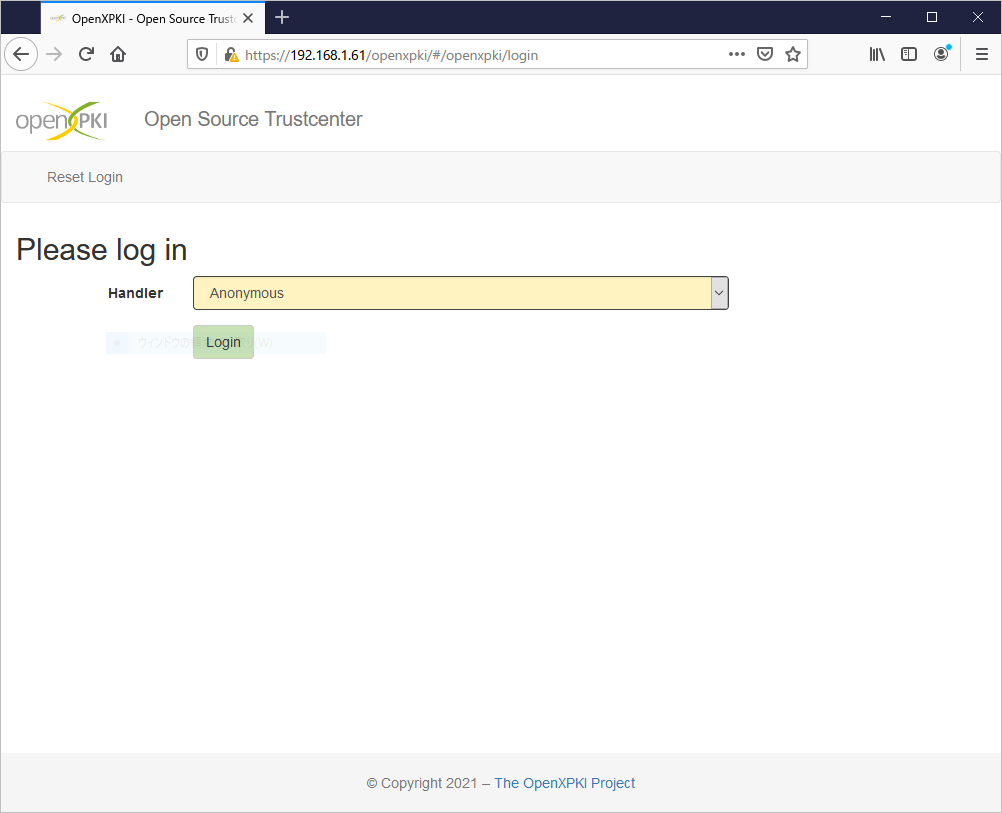
Verify (Web Access)
https://FQDN or IP Address/ へアクセスする。